Getting started
Reporting
Configuration
Updates
Cloud
Connect to your cloud provider and retrieve published architectures.
Overview
The Cloud page provides a centralized view of all connected cloud environments in your organization, serving as the foundation for generating architectures, detecting insights, and enforcing guardrails in Dawnguard.
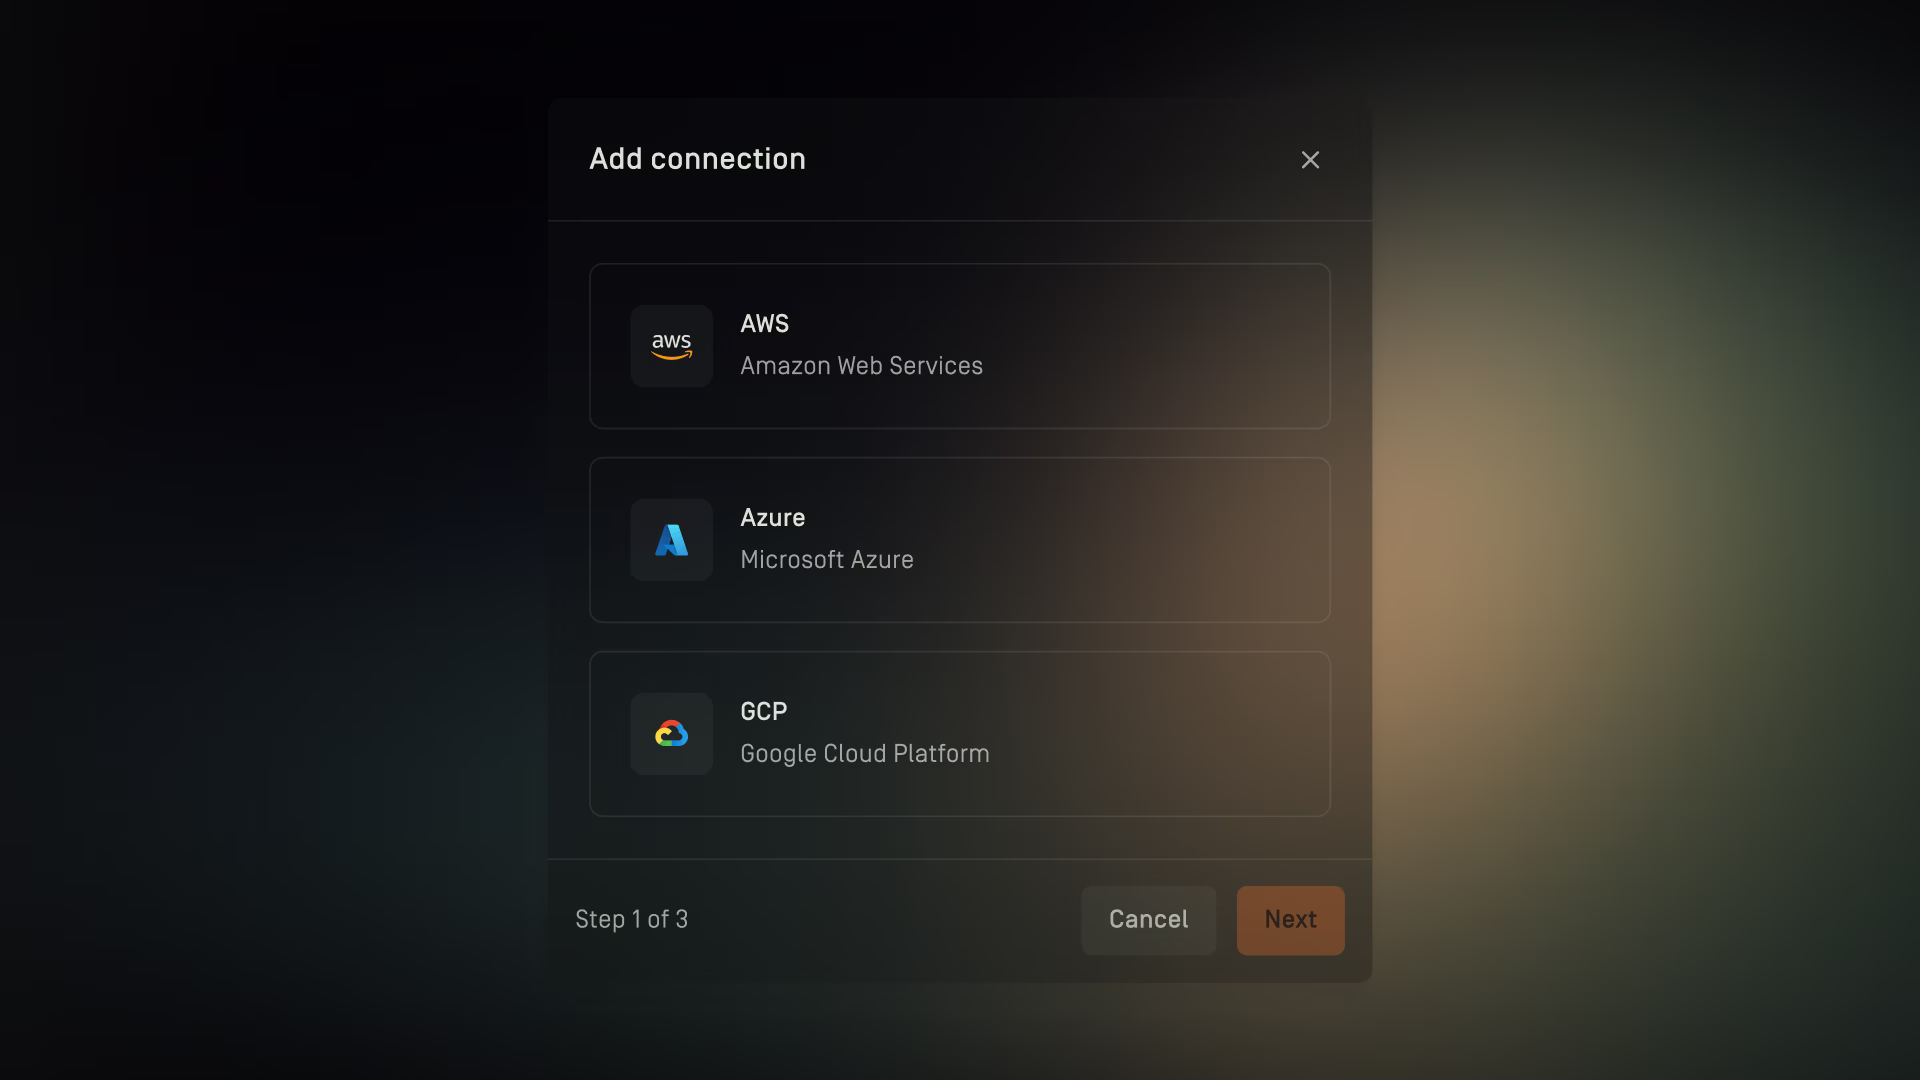
Add cloud connection

Amazon Web Services
- In the Dawnguard app, go to Settings → Cloud
- Click + Add Connection
- Select AWS (Amazon Web Services)
- Click Next
- Enter a connection name
- Optionally enter a description
- Click Next
- For the Access Key and Secret Access Key:
- Go to https://console.aws.amazon.com and log in to your AWS account
- In the AWS search bar, type “IAM” and select IAM under Services
- Under Access management, click Users
- In the user table, click Create user
- Enter a username with the suggested format: {SUBSCRIPTION}_DAWNGUARD_READER (change SUBSCRIPTION), then click Next
- Under Set permissions, select Attach policies directly
- In the permissions policies table, search for ReadOnlyAccess
- Use the Filter by type dropdown and select AWS managed job function to narrow results
- Select the ReadOnlyAccess policy
- Under Set permissions boundary, you may optionally define a permissions boundary
- Click Next, review your settings, and then click Create user
- Once the user is created, locate and click on dawnguard.app in the user table
- Go to the Security credentials tab
- Under Access keys, click Create access key
- For the Use case, select Third-party service, check the confirmation box, and click Next
- Enter a description tag value, then click Create access key
- Copy the Access key and Secret access key (these are shown only once)
- Enter these values in Dawnguard to complete the setup
- You can optionally check Daily Sync to automatically update cloud architectures each day
- Click Add to complete the cloud connection setup
Microsoft Azure
- In the Dawnguard app, go to Settings → Cloud
- Click + Add Connection
- Select Azure (Microsoft Azure)
- Click Next
- Enter a connection name
- Optionally enter a description
- Click Next
- For the Tenant ID, Client ID and Client Secret:
- Go to https://portal.azure.com and log in to your Azure account
- In the search bar, type App registrations and select it under Services
- Click + New registration
- Enter a name with the suggested format: {SUBSCRIPTION}_DAWNGUARD_READER (change SUBSCRIPTION), then click Register
- Under the Manage section, select Certificates & secrets
- Click + New client secret
- Enter a description and choose an expiration period
- Click Add
- Copy the Client secret value (this is shown only once) and store it securely
- Go to the Overview tab and copy the Application (client) ID and Directory (tenant) ID
- Enter these values in Dawnguard
- In the search bar, type Management groups and select it under Services
- Select the Management group(s) or Subscriptions you want Dawnguard to read data from
- Click Access control (IAM)
- Click + Add, then choose Add role assignment
- Under Job function roles, search for Reader and select the Reader role
- Click Next
- Click + Select members
- Search for and select the app registration you just created
- Click Select
- Click Next
- Choose the assignment duration according to your company’s requirements
- Click Next again
- Review all details, then click Review + assign to finalize the role assignment
- You can optionally check Daily Sync to automatically update cloud architectures each day
- Click Add to complete the cloud connection setup
Syncing connections
Daily sync
When daily sync is enabled, the cloud architecture linked to the connection is automatically updated each day.
Manual sync
Syncing can also be triggered manually:
- Go to Settings → Cloud
- Hover over a cloud's row
- Click on the dotted menu
- Select Sync
- Syncing may take some time to complete
Managing cloud connections
Rename a connection
- Go to Settings → Cloud
- Hover over a cloud's row
- Click on the dotted menu
- Select Rename connection
- Rename the cloud connection
- Click Save changes
Configure a connection
- Go to Settings → Cloud
- Hover over a team's row
- Click on the dotted menu
- Select Configure
- Re-enter the AWS secret access key or the Azure client secret
- Update any other fields if needed
- Click Save changes
Delete a connection
- Go to Settings → Cloud
- Hover over a cloud's row
- Click on the dotted menu
- Select Delete
- Enter the connection name in the confirmation modal
- Click Delete