Single Sign-On (SSO)
Learn how to set up and configure Single Sign-On (SSO) for your Dawnguard organization.

Overview
This page explains how to configure Single Sign-On (SSO) with Dawnguard, from receiving the SSO setup email to completing setup through Microsoft Entra ID. It covers selecting your SSO domains, granting required permissions, creating an app registration, and sharing OIDC details to complete the connection and enable access for your organization.
Microsoft Azure SSO

SSO Setup Complete
You are now redirected back to the Dawnguard app. Your SSO has succesfully been connected.
To login, you should navigate to the Azure portal and assign users to the newly created "Dawnguard One-Click Connect" Enterprise app to provide access to the system.
.jpg)
SSO Setup Email
Dawnguard will send your technical PoC a one-click SSO setup e-mail. Once you receive this e-mail, you have 48 hours to click the link in the e-mail to connect your Entra-ID to Dawnguard. If your e-mail has expired, please request a new e-mail from customer support.
.jpg)
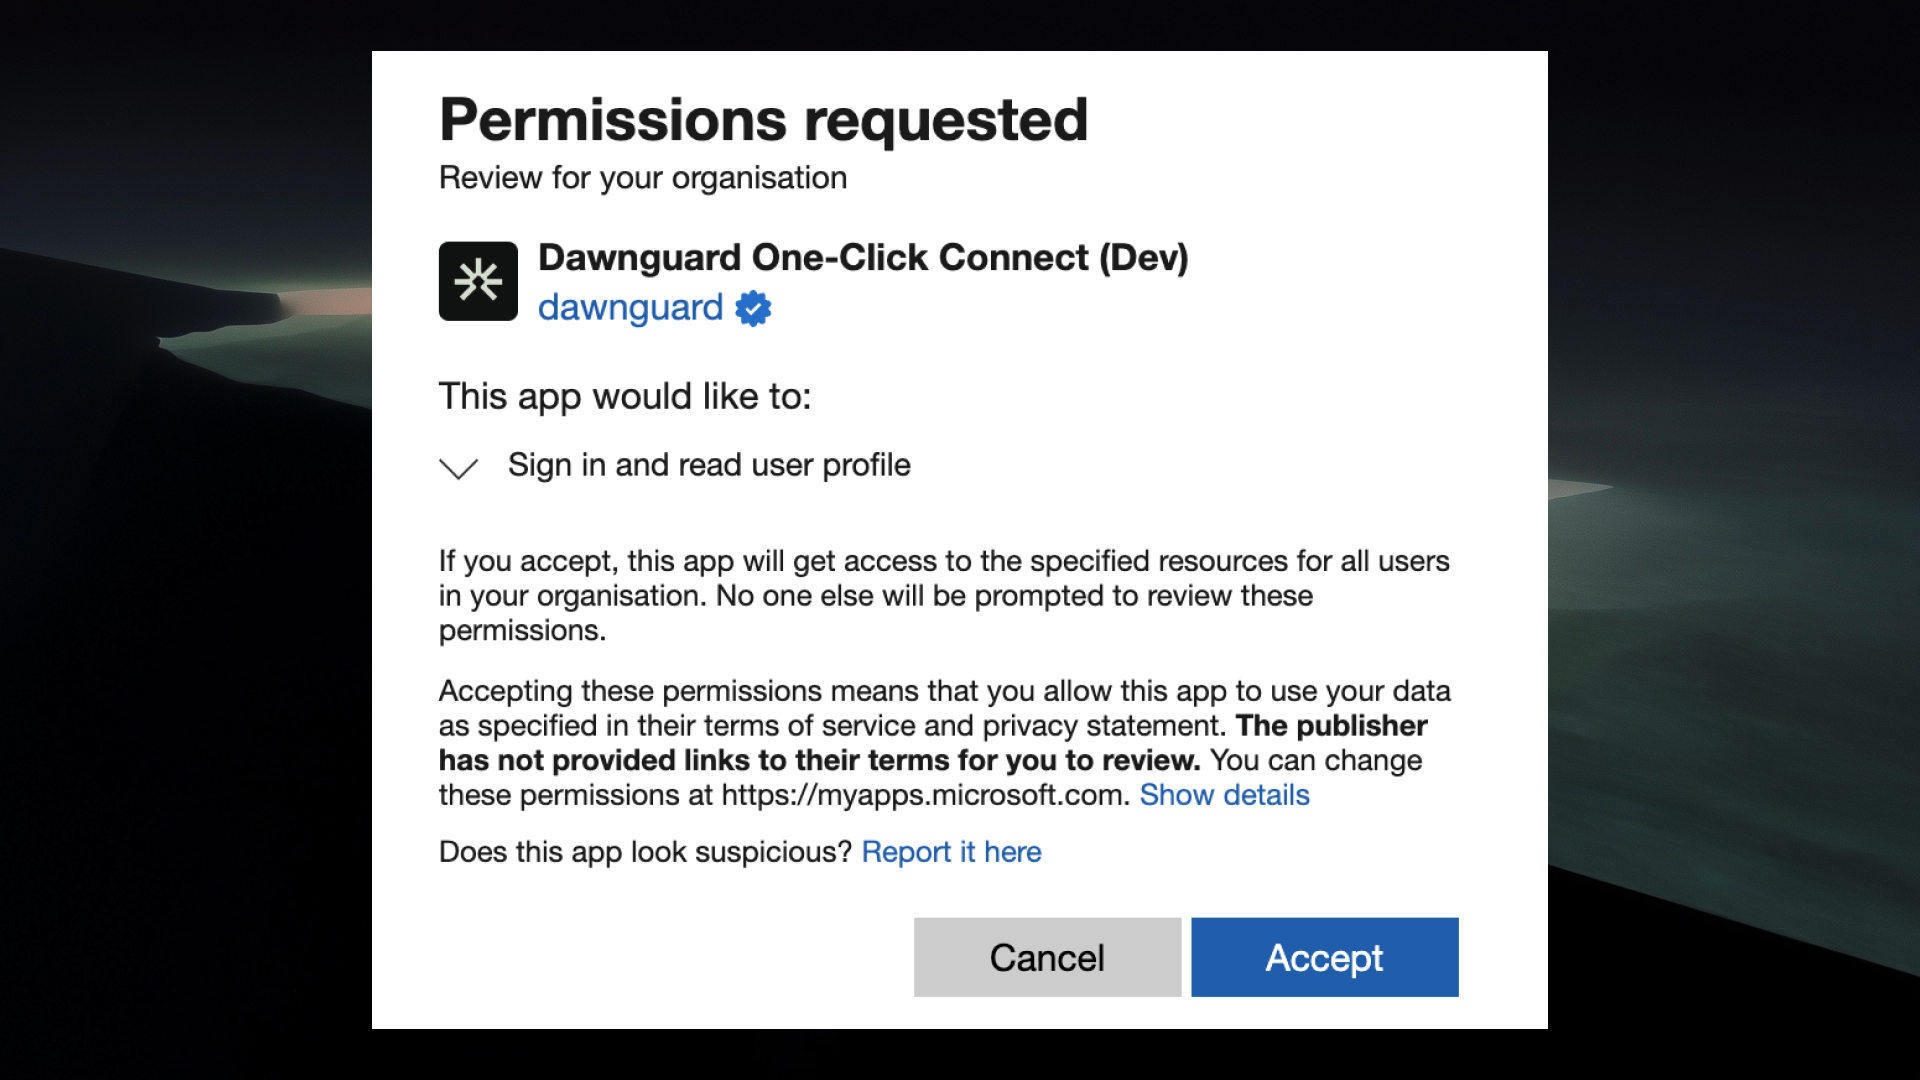
Granting permissions
Once you have logged-in, Entra-ID will prompt you to provide consent to the permissions needed by the Dawnguard App. You can click "Accept" to continue.
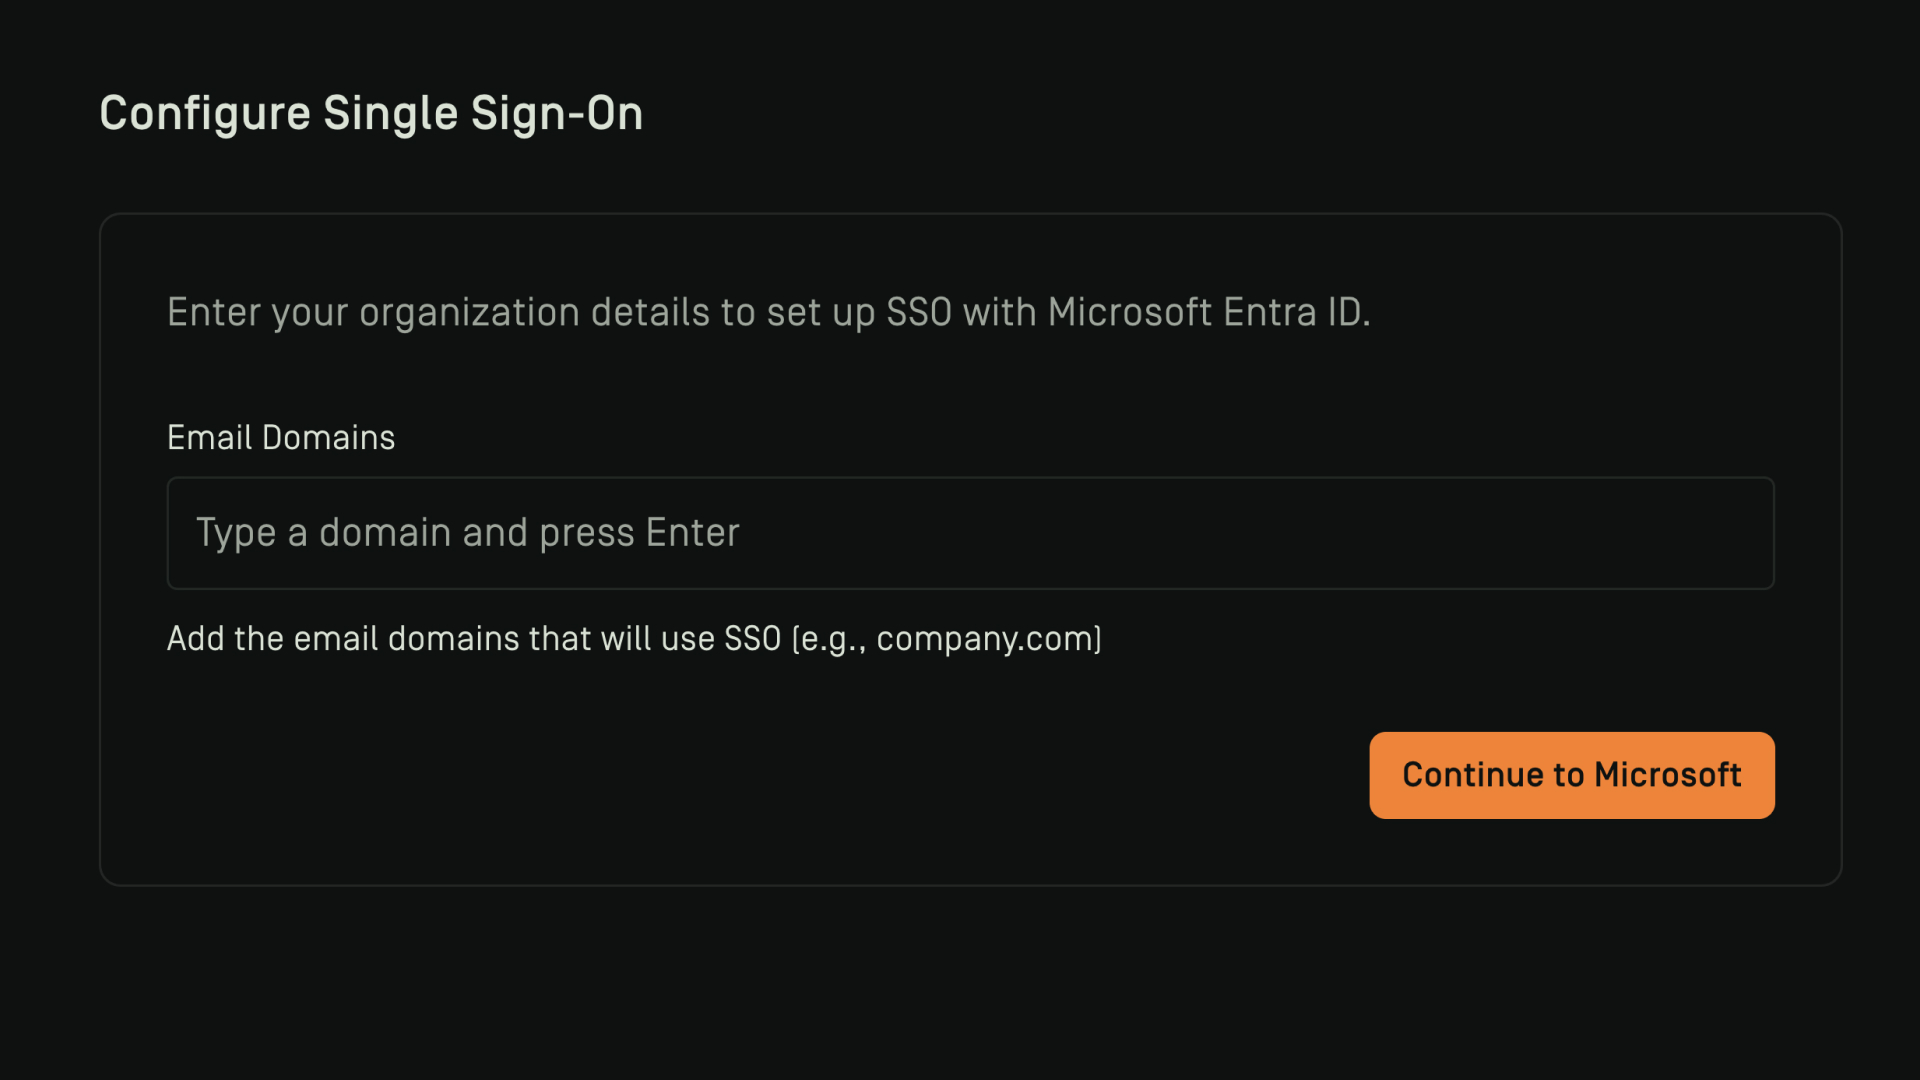
Selecting your SSO domain(s)
After clicking the link in the SSO setup e-mail, you will be taken to the Dawnguard application. The system will then ask you to;
1. Provide the email domains that your users sign in with.
For example, if your user's login with email@company.com OR email.company.nl you should register both company.com and company.nl. Registering these domains allows our system to determine which customer is signing in, without requiring customer-specific domain names.
2. Click continue to Microsoft
3. Login with your Microsoft account
Okta SSO
Step 1: Create an Application in Okta
- Log in to your Okta Admin Console.
- Navigate to Applications > Applications.
- Click Create App Integration.
- Choose OIDC - OpenID Connect and Web Application.
- Click Next.
Step 2: Configure Application Settings
- App integration name: Dawnguard
- Sign-in redirect URIs:
- https://dawnguard.app/auth/callback
- Sign-out redirect URIs (optional):
- https://dawnguard.app/logout
- Assignments: Choose whether the app is assigned to everyone or specific groups/users.
- Click Save.
Step 3: Retrieve OIDC Credentials
- After saving, go to the application’s General tab.
- Copy the following for Dawnguard configuration:
- Client ID
- Issuer (Authority) URL (e.g., https://dev-xxxxxx.okta.com/oauth2/default)
- Do not share the client secret if Dawnguard uses a public flow.
Steps 4 through 6 only apply when the customer has an Okta API Access Management SKU and has setup a custom authentication server. Otherwise RBAC via Okta is not possible and these steps can skipped.
Steps 4 to 6
Step 4: Configure App Roles
- In Okta, go to Directory > Groups.
- Create groups:
- dawnguard-user
- dawnguard-admin
- Assign users to the appropriate group(s).
Step 5: Map Roles to OIDC Claims
- In the Okta Admin Console, go to Security > API > Authorization Servers.
- Select the default server, then go to the Claims tab.
- Add a claim:
- Name: roles
- Include in token type: ID Token (and/or Access Token)
- Value type: Groups
- Filter: Matches regex dawnguard-.*
- Include in: Any scope (or as required)
- This ensures the user's group membership (role) is included in the OIDC token.
Step 6: Assign Users or Groups to the Application
- Go to Applications > Dawnguard > Assignments.
- Click Assign > Assign to People or Assign to Groups.
- Select the users or groups and assign them.
Step 7: Share with Dawnguard
- Provide Dawnguard with:
- Client ID
- Issuer (Authority) URL
- (Optionally) Group claim name if different from roles